Almost Paperless Office
Published on Jul 15, 2020
Recently I looked at my increasingly large pile of important documents and decided to make sorting them a small project. After a while it was clear that a lot of them are not important enough to keep around. Invoices, warranty certificates or insurance status updates are likely not necessary to have in their original paper form.
Having them in a big binder makes it very hard to quickly find a document that you know you have somewhere.
The obvious solution was to look into a good setup for a paperless “office”. Before starting my research I narrowed it down to a number of features that I deemed non-negotiable:
- Good OCR (Text recognition)
- Native Mac app
- Syncing with iCloud Drive possible
- Easy way to fulltext search through all documents
- A way to tag and organize documents by topics or categories
- No closed source or proprietary archiving format / container
That means that at a higher level my setup consists of three parts: A scanner, software to organize documents and a shredder to destroy the documents before throwing them out.
Step 1: Scanning
I spent some time reading reviews and in the end decided on buying the Fujitsu ScanSnap iX1500. Its predecessors were well regarded and while everyone agreed that the software was not particularly beautiful it did its job well enough.
Step 2: Organizing
Even before starting this project I played around with EagleFiler and enjoyed it. It's from a reputable developer (and blogger) who's apps have been around for a long time.
EagleFiler makes having a open format a feature and not just an afterthought. This, to me, is very important for a software that should keep my documents safe and accessible for a long time.
As written on the website:
EagleFiler libraries use an open format: regular files and folders that are fully accessible to your other applications.
The site has a very exhaustive help section documenting every distinct feature of the app. One relevant example: Importing from a Scanner
Right now I have the included scanner software (ScanSnap Home) set up to scan directly into a directory (~/Documents/Incoming Scans). ScanSnap is configured to hand over its scanned documents directly to ABBYY FineReader for ScanSnap which performs OCR and stores the resulting file in the mentioned Incoming Scans directory.
EagleFiler has a special watch directory called "To Import" located in its library directory (~/Documents/EagleFiler Library in my case) which promptly imports files thrown in there into its internal library. Unfortunately I had issues with that as then ABBYY FineReader complained that it can only work on files directly coming from ScanSnap or failed with the following obscure error message.
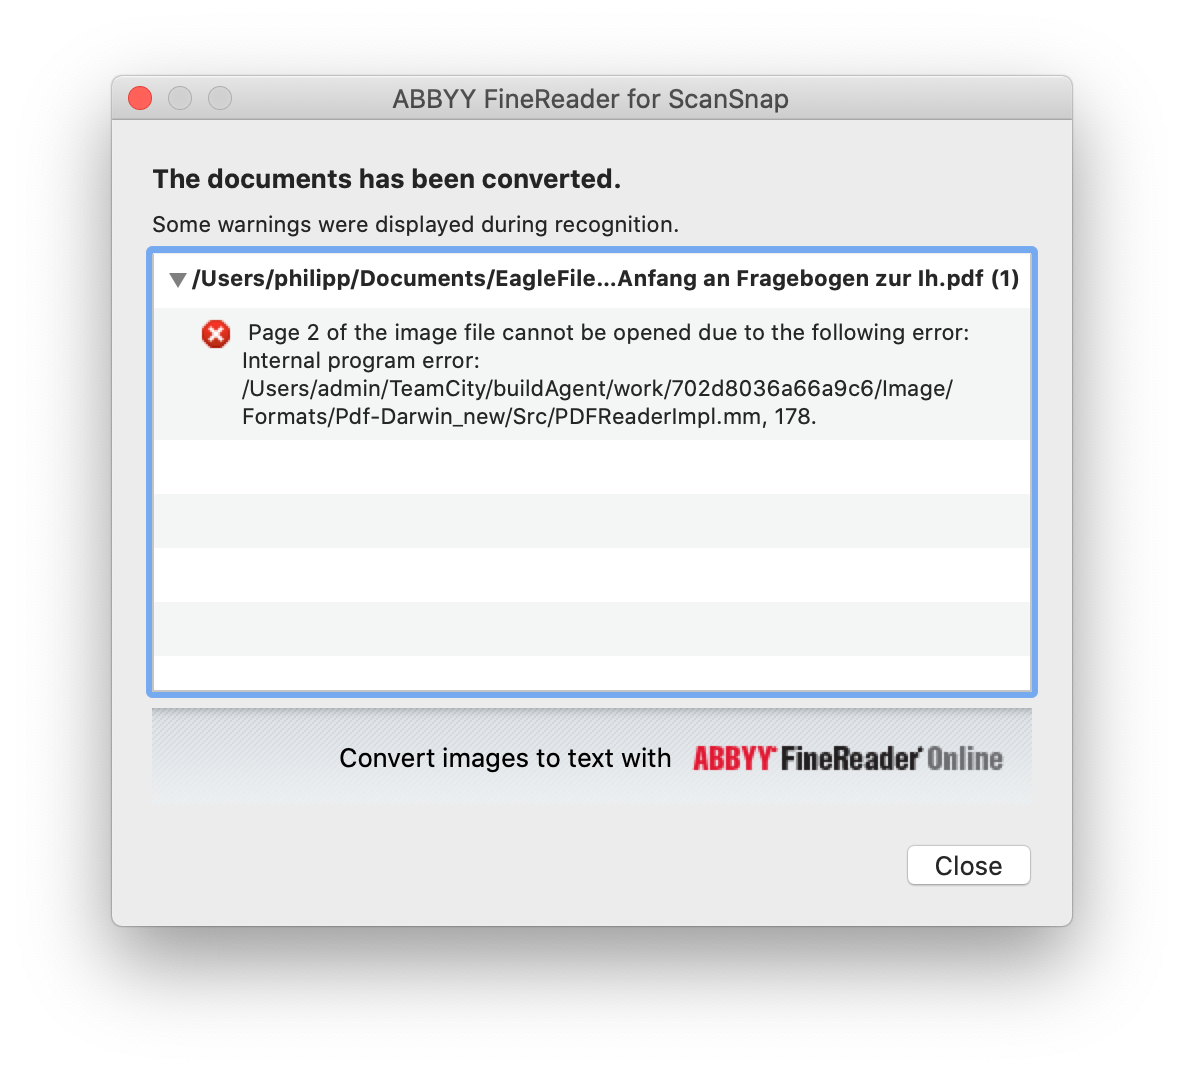
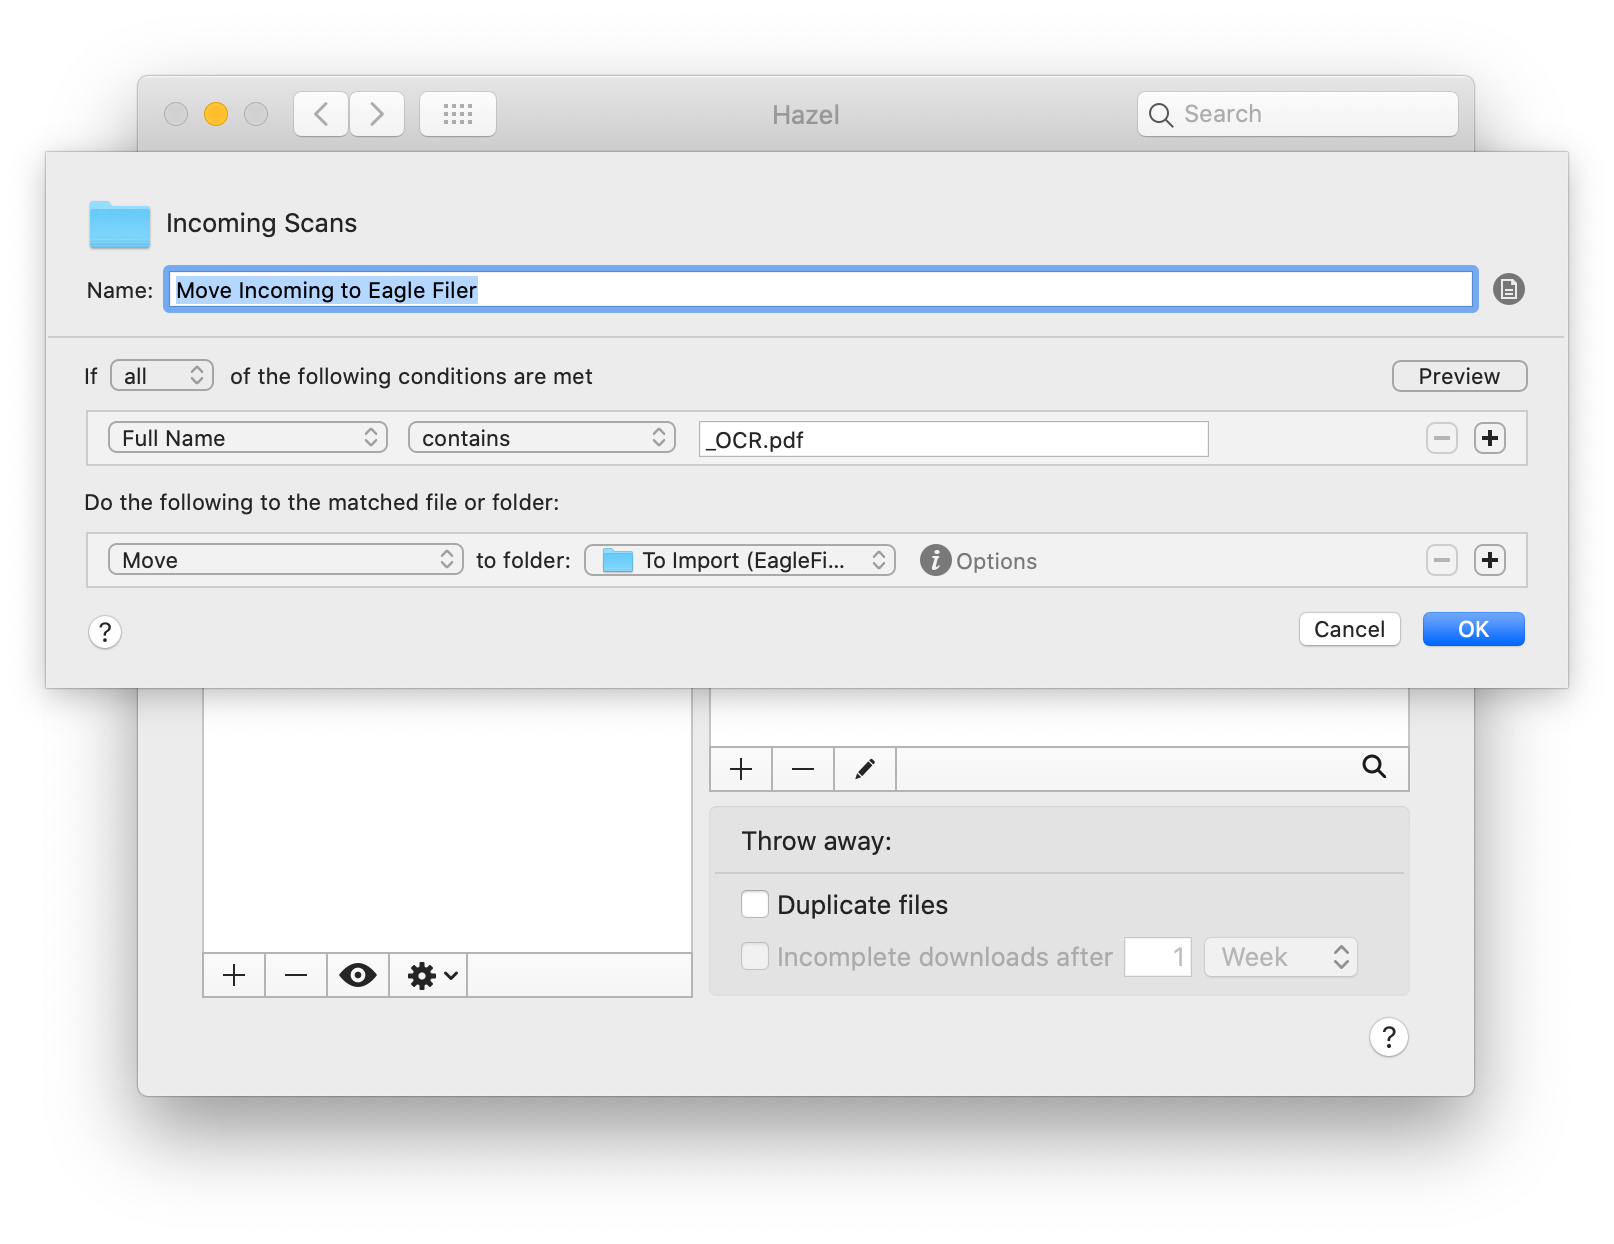
I contacted the — very helpful and quick to respond — ABBYY support but they said the issue isn't known after escalating it. My guess is that this is some kind of race condition if multiple apps try to access the same file. I resolved the issue by using Hazel to monitor the "Incoming Scans" folder and moving the file to EagleFiler's "To Import" directory once the file was processed by ABBYY FineReader and received its _OCR.pdf suffix.
With this glue component everything now works without a hitch and the ABBYY error message never showed up again. I was able to scan 100 documents without it showing up. In my first iteration I stored my "EagleFiler Library" directory in iCloud Drive and suspected that that's a problem but it seems to only be related to ABBYY accessing the file at the same time. I did have some other issue with putting it in iCloud Drive but that was mostly related to ScanSnap not being able to deal with long file paths and a workaround was swiftly explained by the developer in the support forum.
Update: In the EagleFiler 1.8.14 Changelog I spotted an interesting improvement that sounds like it’ll help with that.
The To Import folder can now be replaced by an alias if you want to relocate it to another location (e.g. to work around a ScanSnap path length limitation).
Tagging & Organizing
This is one of the areas where I'm not completely satisfied with EagleFiler yet as the importing workflow seems unnecessarily unoptimized for an action that will be done very frequently.
These days I’m importing a lot of documents which don't have metadata yet as they come — with a slight detour through the OCR app — from the scanner. They do have a filename but I want to set the "From" field (Phone Company Ltd., Insurance Company,...) and optionally tag them based on what kind of document it is (Insurance, Taxes, Invoices,...).
When a new file comes in I open its info panel via Command + I and I am presented with the following options.
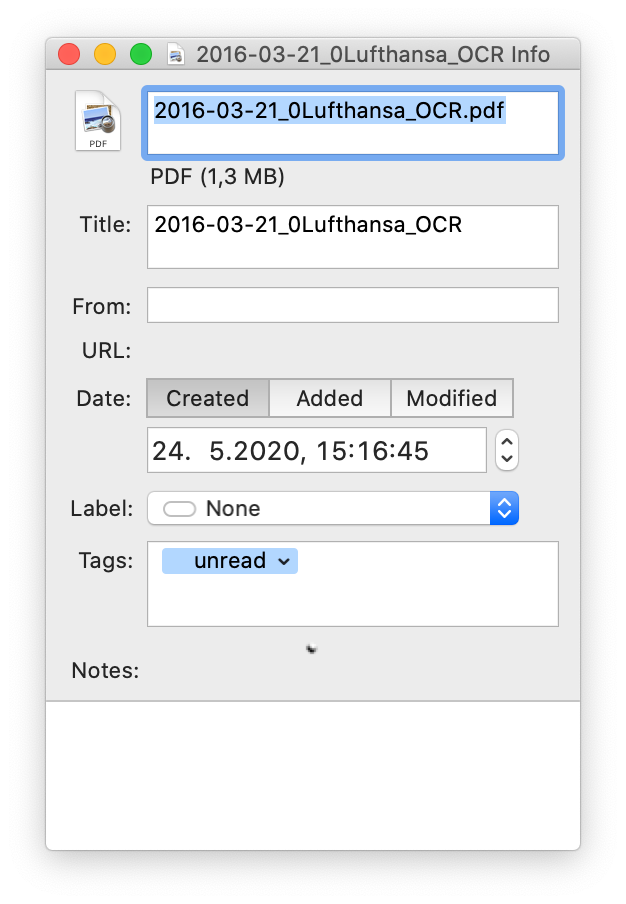
It's easy to navigate through them with the keyboard but only the "Tags" field auto completes existing tags. That means that I have to use a clipboard manager or external tool (Thread in support forum) to make sure I use a consistent spelling of the source name. (Was it Telekom AG or Telekom GmbH again?). Also to reach the (for me) often used Tags field I have to hit tab 9 times to jump through the date and time fields.
I would love to have a kind of more “Inbox" view optimized for quick tagging similar to how the "New To-Do" modal in Things.app works. It does this exceptionally well and adding / tagging a new task is fast.

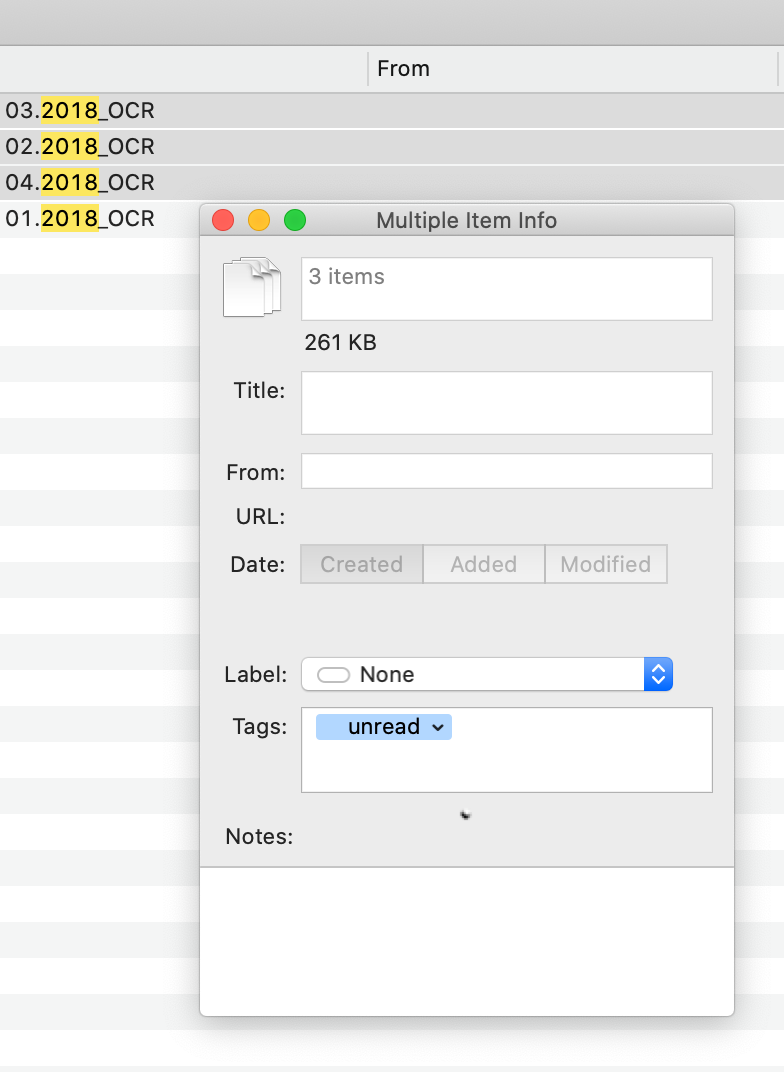
Another usability issue I found was tagging multiple entries. If I scan 10 related documents it would be helpful if I can just select all of them, open the Info panel and set the “From” field. This doesn’t seem to be possible right now as the field is disabled in this view.
Even with this small annoyance I'm personally happy with the solution as the search works very well and is extremely fast. Knowing that the developer is actively responding to threads in the support forum and continuously developing the app are more important to me. There's also a lot of features that I haven't used yet and will have to incorporate into my workflow at some point.
Step 3: Destroying the evide...documents
Once the documents are scanned it has to be decided if it's worth keeping the original or not. Documents where the original needs to be kept around like insurance policies, most tax documents and salary slips go back into the binder.
I didn't feel comfortable with throwing my bank and some tax documents in the regular paper trash so I ordered a small document shredder. In my case that's a Leitz IQ Home Office Document Shredder. It does the job just fine, any of these will probably do.
Make sure you have proper backups, losing a bunch of files is sometimes easier than a big stack of paper documents.