Nginx, Wildcard SSL and Subdomains
Published on Jun 10, 2014
I just setup SSL on all my *.notmyhostna.me domains and here's how I did it.
Buy certificate
First you need to buy a wildcard certificate, I bought one from cheapsslsecurity.com.
If you want to secure subdomains you'll need to spend a little bit more and go for one of their wildcard certificates listed under the "Secure Sub-Domains" section. I went for the cheapest one, costing me ~130$ for two years, which is reasonable.
During the checkout process they ask you for your "CSR" - and that's what we are going to give them. Because we are now going to generate a bunch of files and want to store them all in our nginx directory we are going to create a new directory in the nginx directory called ssl.
Navigate to your nginx directory usually located at /etc/nginx/ and create a new subfolder called ssl.
In public key infrastructure (PKI) systems, a certificate signing request (also CSR or certification request) is a message sent from an applicant to a certificate authority in order to apply for a digital identity certificate.
To generate the CSR and your private key run the following command while being located at /etc/nginx/ssl).
openssl req -nodes -newkey rsa:2048 -keyout notmyhostna.me.key -out notmyhostna.me.csr
During this process the key tool will ask you for some information:
Country Name (2 letter code) [AU]: AT
...
Common Name (e.g. server FQDN or YOUR name) []: *.notmyhostna.me
The important part here is to set the Common Name to *.notmyhostna.me. This will allow us to use this certificate for multiple subdomains in the future.
The result of this step will be two files called notmyhostna.me.csr and notmyhostna.me.key in your current directory. Now open the csr file and copy/paste the content into cheapsslsecurity's CSR form.
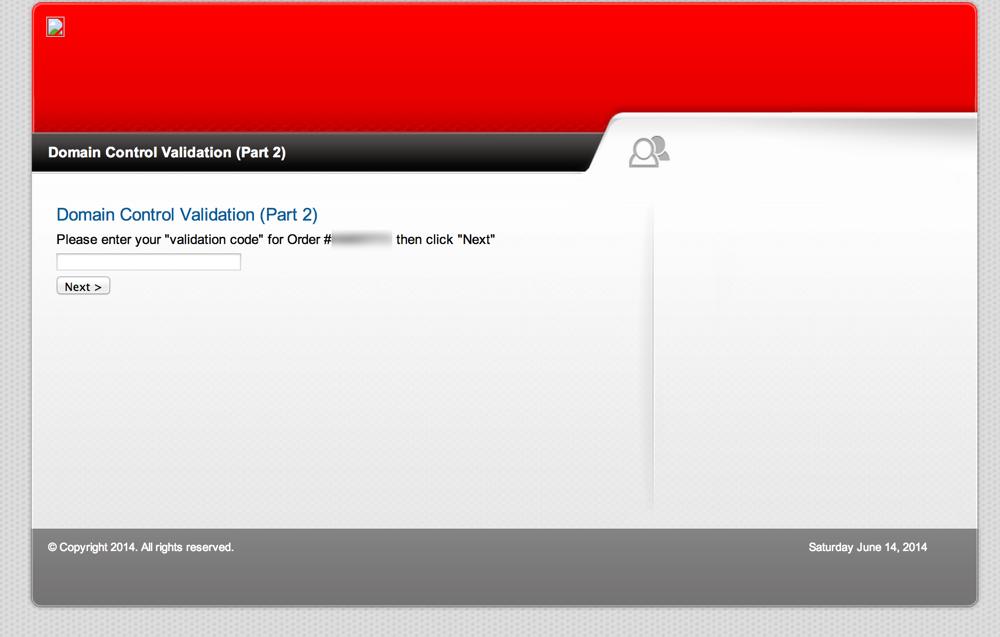
I wish I'd be kidding when I tell you the mail looks like some cheap phishing mail but it does. With broken images and everything.
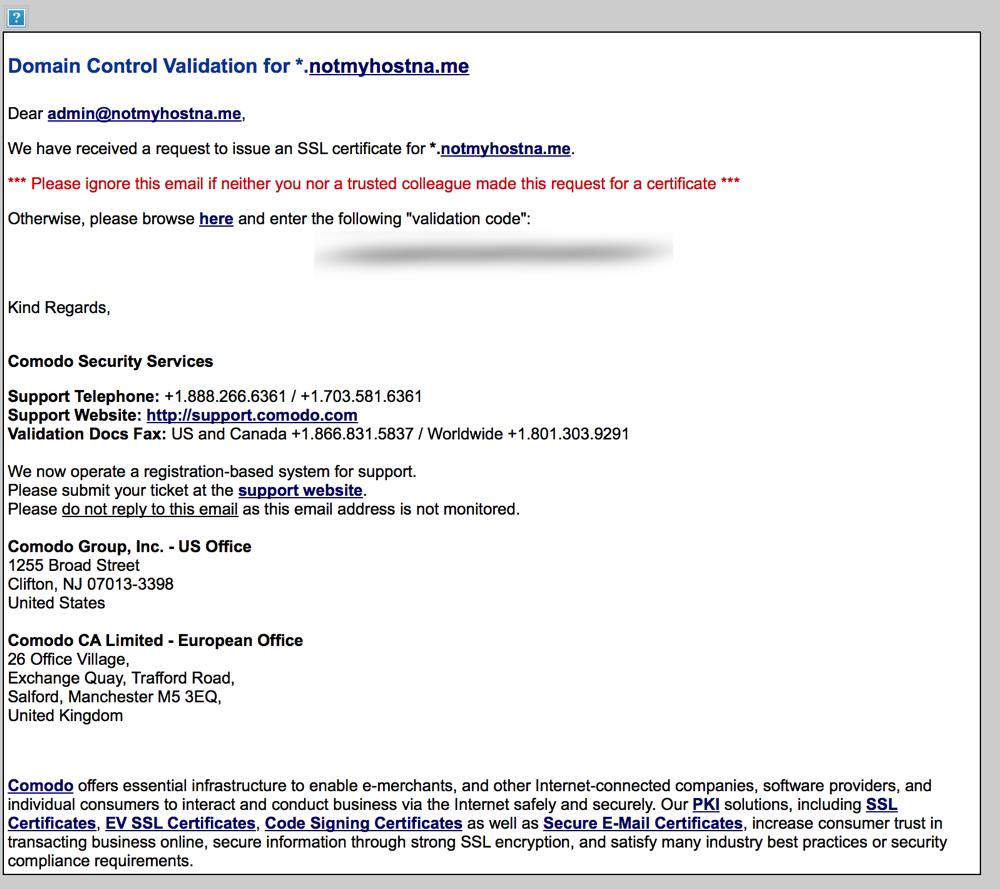
The Comodo site where it's redirecting you isn't any better so get used to it:
The next mail you'll get is one with an attached zip file containing the root certificates and your purchased wildcard certificate:
- Root CA Certificate - AddTrustExternalCARoot.crt
- Intermediate CA Certificate - PositiveSSLCA2.crt
- Your PositiveSSL Wildcard Certificate - STAR_notmyhostna_me.crt
Transfer this zip file to your server, unzip it and move the files to your ssl directory.
Build the certificate chain for nginx with the following command:
cat STAR_notmyhostna_me.crt PositiveSSLCA2.crt AddTrustExternalCARoot.crt >> notmyhostna.me.crt
(The order matters, so don't get creative here)
Now we are going to setup nginx. Create another child directory called /etc/nginx/ssl/notmyhostna.me and move notmyhostna.me.crt and notmyhostna.me.key to this directory. These are the only files nginx will need.
Nginx
I usually have one main config file for every domain, and multiple sub configurations for the subdomains. I think it makes dealing with multiple configurations for the different subdomains easier than having one massive file containing everything.
The "main" configuration file
server {
    listen  443 default_server ssl;
    # _; is used for the default vHost
    server_name         _;

    ssl_certificate     /etc/nginx/ssl/notmyhostna.me/notmyhostna.me.crt;
    ssl_certificate_key /etc/nginx/ssl/notmyhostna.me/notmyhostna.me.key;

    ssl_session_cache    shared:SSL:10m;
    ssl_session_timeout  10m;

    # Perfect Forward Security
    ssl_protocols TLSv1 TLSv1.1 TLSv1.2;
    ssl_prefer_server_ciphers on;
    ssl_ciphers "EECDH+ECDSA+AESGCM EECDH+aRSA+AESGCM EECDH+ECDSA+SHA384 EECDH+ECDSA+SHA256 EECDH+aRSA+SHA384 EECDH+aRSA+SHA256 EECDH+aRSA+RC4 EECDH EDH+aRSA RC4 !aNULL !eNULL !LOW !3DES !MD5 !EXP !PSK !SRP !DSS +RC4 RC4";
}
If you want to read a more in-depth description of these options follow this link: http://axiacore.com/blog/enable-perfect-forward-secrecy-nginx/
That's our main server block listening on the SSL port 443. It'll use the SSL settings we defined in the server block above (The "default" server). Add this to the same file.
server {
    listen      443;
    server_name notmyhostna.me;

    error_log   /var/log/nginx/notmyhostna.me.error.ssl.log;
    access_log  /var/log/nginx/notmyhostna.me.access.ssl.log;

    root /var/www/notmyhostna.me/;
    index index.html;
}
If you want to redirect all requests on port 80 to the SSL version add another server block with a redirect to the same file:
server {
    listen      80;
    server_name notmyhostna.me;
    rewrite     ^   https://$server_name$request_uri? permanent;
}
A configuration file for a subdomain
This configuration file will still use our default server we setup in the main file that's why we just need our regular server blocks here. Ignore the proxy_ settings, they are just used for this blog because it's using nginx as a reverse proxy for the NodeJS backend.
server {
    listen      443;
    server_name blog.notmyhostna.me;

    error_log   /var/log/nginx/blog.notmyhostna.me.error.ssl.log;
    access_log  /var/log/nginx/blog.notmyhostna.me.access.ssl.log;

    root /var/www/blog.notmyhostna.me/;
    index index.html;

    location / {
        proxy_pass http://localhost:2368/;
        proxy_set_header Host $host;
        proxy_buffering off;
        autoindex  off;
    }
}

server {
    listen      80;
    server_name blog.notmyhostna.me;
    rewrite     ^   https://$server_name$request_uri? permanent;
}
Now, after enabling the sites (symlinking from sites-available to sites-enabled) use nginx -t to check if there are any errors in the config and if there are none restart nginx and your sites should be available on https.
nginx -t
nginx: the configuration file /etc/nginx/nginx.conf syntax is ok
nginx: configuration file /etc/nginx/nginx.conf test is successful
Optional last step is to check your SSL setup via SSL Labs Server Test ... zwecks da security warads gwesen.
This setup should result in an A.
Further links if you want to know why things are done this way: